Creating a Simple Responsive Navigation menu with CSS
A dead-simple CSS-only navigation menu that adapts well to the screen size and can be customized to match your website's theme.
What is the simplest form of navigation on a web page?
If a horizontal nav menu popped in your mind after reading that question, that’s exactly what you’re gonna learn to create in this post.
This horizontal navigation will be semantically sane, pretty, and adaptive to different screen sizes or fully responsive in nature.
Assuming you already have the basic idea of using HTML and CSS, I invite you to see the finished menu. before you go any further.
Note: This navigation is not going to have dropdowns. If you are looking for a fly-out dropdown menu solution, below are some handy resources:
Structuring the Navigation Menu
The general practice to set up navigation menu is treating it as a list of hyperlinks wrapped inside a <nav> element.
The <nav> element automatically provides navigation hints to the web browser, enhancing the accessibility and usability of your web app.
<nav class="nav-menu">
  <ul class="menu-list">
    <li><a href="#">Home</a></li>
    <li><a href="#">About</a></li>
    <li><a href="#">Contact</a></li>
    <li><a href="#">Store</a></li>
  </ul>
</nav>
Marking up links in a list inside a <nav> element provides additional semantic structure and accessibility clarity, which is optional in case of flat, single-level menus that aren’t suppose have sub-menus.
<nav class="nav-menu">
  <a href="#">Home</a>
  <a href="#">About</a>
  <a href="#">Contact</a>
  <a href="#">Store</a>
</nav>
To keep things simple, we’ll stick to this structure and work on it further to achieve a finished inline navigation menu.
Note: Make sure to replace the # with your original URLs before deploying.
Aligning the menu items
We’ll take a mobile-first approach to lay out our menu, which means our menu will be 100% compatible to small screens by default.
Note: I’ll advise you to use a CSS reset beforehand to keep things consistent across all the browsers.
The mobile-first baseline
The structure we currently have for our menu will automatically render it inline, but that’s not how a menu quite looks like. Also, the default appearance of the menu should be the items stacked on top of each other.
Let’s start by turning our main navigation element into a flexbox to have better control over alignment as well as the spacing between the items:
.nav-menu {
  display: flex;
  flex-direction: column;
  gap: .35rem;
}
The above code will arrange our menu items in a vertical, stacked fashion, all separated by a little gap.
Shaping the menu-items
Hyperlinks are inline blocks by default. In our case, since their parent container, or the main navigation element is a flexbox, these links will automatically behave like block-level elements.
Let’s add some definition to these links with some padding:
.nav-menu a {
  padding: .75rem 1rem;
}
Progressively enhancing for bigger screens
For screens wider than 768 pixels, we’ll use a small media query and flex-direction to achieve an effortless horizontal flow across the screen. This is basically where we make our menu “responsive”.
/* 1rem = 16px => 48 * 16 = 768 */
@media only screen and (min-width: 48rem) {
  .nav-menu {
    flex-direction: row;
  }
}
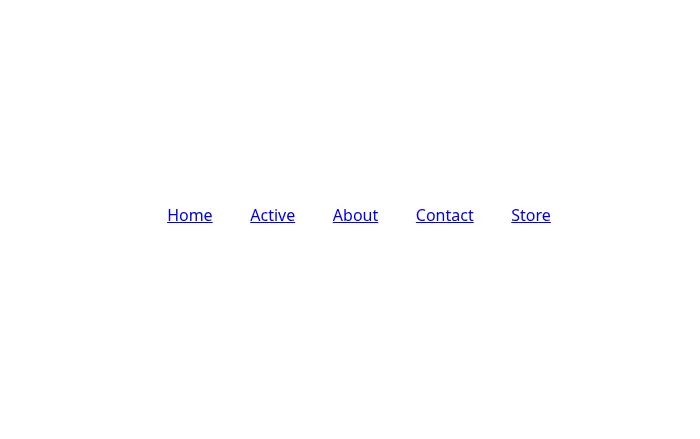
Our navigation menu has started taking its shape now, and should look something like below, which indeed needs some cosmetics:
Styling the menu
Keeping it simple, let’s add some finishing touches to our simple navigation menu. I’m adding some colors, little transitions, and rounded corners to make it look aesthetically acceptable.
:root {
  --nav-bg: #d4d6e0;
  --nav-link-color: #241f27;
  --nav-link-hover-bg: #dddfe9;
}

.nav-menu {
  background-color: var(--nav-bg);
  border-radius: .75rem;
}

.nav-menu a {
  text-decoration: none;
  border-radius: .5rem;
  color: var(--nav-link-color);
  transition: background-color .25s ease-in-out;
}

.nav-menu a:hover,
.nav-menu .active {
  background-color: var(--nav-link-hover-bg);
}
And that wraps it up. See a working demo of this implementation.
Conclusion
I tried my best to keep this guide beginner-friendly. But still, if you have some questions, you are always welcome to reach me out.
Also, if it’s not something you were looking for, you must check out this responsive CSS dropdown menu guide, which elaborates more on concepts like multi-level menus and also discusses their toggling on button clicks.

Written by Rahul C.
Founder and curator of W3Bits. Have questions, suggestions, or anything to say about this post? Reach out on X or send me an email.